Flute Checkout is a hosted payment page that handles the entire checkout experience on your behalf. You redirect your customer to it at payment time, and once the payment is complete, Flute sends them back to your application.
Flute Checkout gives you:
- PCI-DSS compliance. Card data is captured and processed through Flute's secure infrastructure, never touching your servers.
- No frontend work. A single API call creates the payment session. Flute hosts and manages the entire payment UI.
- Branded experience. Customize the hosted page with your logo, colors, and font to match your application.
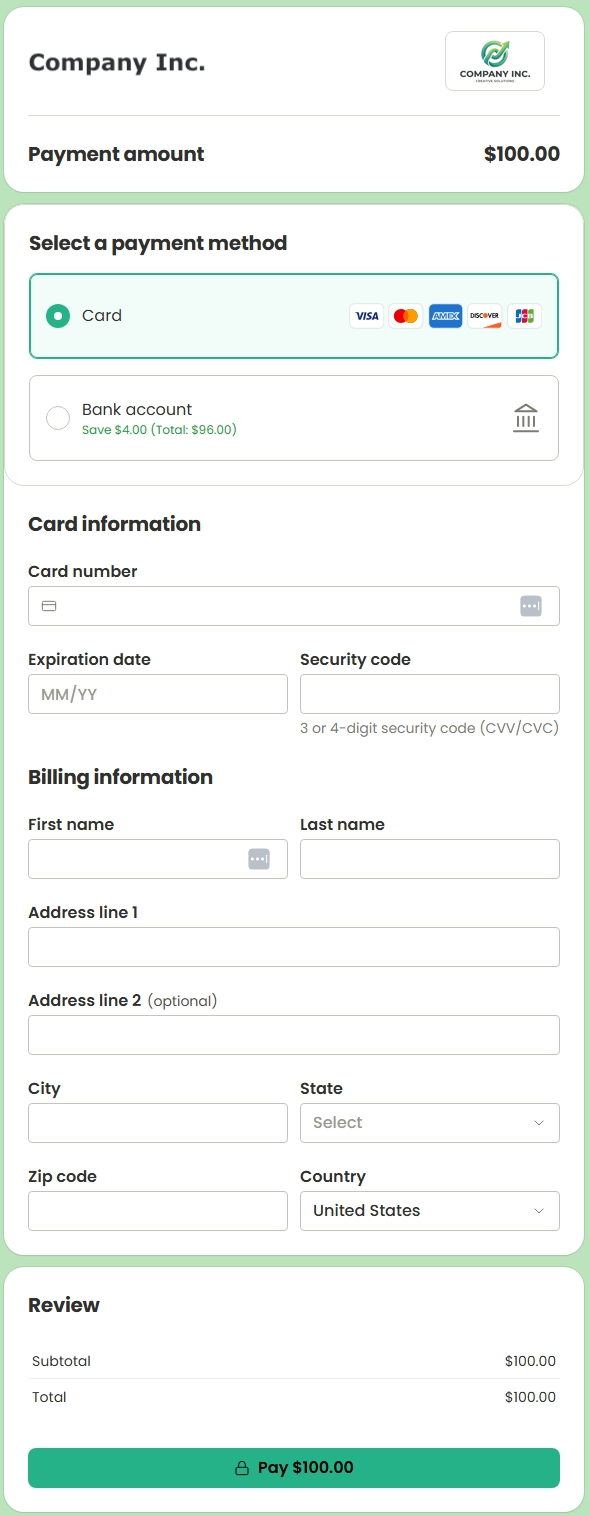
Flute Checkout supports both card and ACH transactions. The integration follows three steps:
- Step 1: Creating a Payment Session from the backend to get the checkout URL.
- Step 2: Redirecting the Customer to the Flute-hosted checkout page.
- Step 3: Verifying Payment once the customer returns to your application.
Sandbox Environment:
https://sandbox.api.flute.comProduction Environment:
https://api.flute.comTo create a payment session, call POST /pay-int-api/payment-sessions from the backend. The following is an example request body showing the fields relevant to Flute Checkout.
POST /pay-int-api/payment-sessions
{
    "amount": 500.00,
    "returnUrl": "https://pay.flute.com/payments/returnUrl/{{paymentSessionId}}",
    "paymentMethodTypes": [ "card", "ach" ],
    "metadata":
    {
        "orderId": "ORD/456",
        "invoiceNumber": "INV-2026-001"
    },
    ...
}
The following is a payment session response body relevant to Flute Checkout.
| Field | Type | Required | Notes |
|---|---|---|---|
| amount | number float | No | The transaction amount. If provided, Flute Checkout displays it as the payment total. If omitted, the customer is prompted to enter an amount. |
| returnUrl | string | No | The URL your customer is redirected to after the checkout flow ends. Include {{paymentSessionId}} as a placeholder in the URL. Flute substitutes the real payment session identifier before returning the URL in the response. See the example response body for details. |
| metadata | object | No | Optional key-value pairs for additional context, such as an internal order ID or invoice reference. Values are sanitized for security. Maximum of 50 key-value pairs. Maximum 40 characters per key, 500 characters per value, 8 KB for the full set. |
| paymentMethodTypes | string[] | No | The allowed payment types. Accepted values: "card", "ach". Defaults to ["card"] if omitted. |
| expiresAt | string/date-time | No | Optional expiration timestamp in an ISO 8601 UTC date-time format, such as 2026-03-12T19:00:00.000Z. The hosted page renders an expired error after this time, preventing further interaction. If omitted, the payment session expires in 30 minutes. |
The default payment session expiration period is 30 minutes. If you are using Flute Checkout for emailed payment links or other flows where the customer may not act immediately, set expiresAt explicitly to a longer window.
Example response body:
{
    "id": "dce6a259-0a1b-4c2d-3e4f-5a6b7c8d9e25",
    "amount": 500.00,
    "currency": "USD",
    "status": "Created",
    "checkoutUrl": "https://public.flute.com/checkout/dce6a259-0a1b-4c2d-3e4f-5a6b7c8d9e25",
    "returnUrl": "https://pay.flute.com/payments/returnUrl/dce6a259-0a1b-4c2d-3e4f-5a6b7c8d9e25",
    "paymentMethodTypes": [ "card", "ach" ],
    "metadata": { "orderId": "ORD/456", "invoiceNumber": "INV-2026-001" },
    "createdAt": "2026-03-12T19:00:00.000Z"
}
The following is a payment session response body relevant to Flute Checkout.
| Field | Type | Notes |
|---|---|---|
| id | string | The payment session identifier. Use this value when redirecting to Flute Checkout. |
| checkoutUrl | string | The fully-formed checkout URL. Redirect your customer to this URL to start the checkout flow. |
| returnUrl | string | The URL the customer is redirected to after the checkout flow ends, with {{paymentSessionId}} substituted with the real payment session identifier. |
| metadata | object | The key-value pairs provided in the request, echoed back in the response. |
Use the checkoutUrl from the session creation response to send the customer to Flute Checkout. Use one of the following methods:
The checkoutUrl is a fully-formed URL unique to the customer's payment session. Redirect to it directly from your server or pass it to any of the client-side methods below.
Load the Flute.js library and call flute.checkoutPage() with the payment session identifier.
<head>
  <script src="https://public.flute.com/lib/v1.0/flute.mjs" type="module"></script>
</head>
const flute = new window.Flute();
flute.checkoutPage('dce6a259-0a1b-4c2d-3e4f-5a6b7c8d9e25')window.location.href = "https://public.flute.com/checkout/dce6a259-0a1b-4c2d-3e4f-5a6b7c8d9e25";When the payment session is completed, cancelled, or expired, the customer is redirected to the returnUrl you provided at payment session creation. The {{paymentSessionId}} placeholder in the URL is substituted with the actual payment session identifier, which you can use to look up the result from the backend.
If no returnUrl was set, the customer remains on the Flute-hosted page and sees a generic confirmation message.
Always verify the payment result from the backend. Never rely on the frontend or the redirect URL alone.
Call the following endpoint after receiving the payment_session.completed webhook or after the customer is redirected to your returnUrl:
GET /pay-int-api/payment-sessions/{paymentSessionId}
Subscribe to the payment_session.completed webhook to be notified when a payment session reaches a terminal state. This is the recommended approach. As a fallback, you can poll the endpoint above and check for the Completed status.
As the customer interacts with Flute Checkout, the payment session moves through these states:
| Status | Description |
|---|---|
| Created | Payment session was initialized but not yet processed. |
| Completed | Payment session was completed. Check transaction details to verify if the payment was approved or not. |
| Cancelled | Payment session was canceled before completion. |
| Expired | Payment session expired before being completed. |
| Failed | Payment was attempted but did not succeed. A new payment session must be created for a new payment attempt. |
Step 3.1: Check the payment session status
The payment session-level status field must be Completed. This confirms the customer went through the checkout flow, but does not by itself confirm the payment was approved.
Step 3.2: Check the transaction status
Check transactionDetails.status against the expected success statuses for your payment type:
Card payments
transactionDetails.status | Meaning |
|---|---|
Authorized | Payment authorized, pending capture. |
Captured | Payment captured. |
PartiallyAuthorized | Partial amount authorized. |
ACH payments
transactionDetails.status | Meaning |
|---|---|
Scheduled | Payment scheduled for processing. |
InProgress | Submission accepted and being processed. |
Additional statuses may appear on subsequent lookups as the payment progresses through its lifecycle. For example, Settled for card payments and Cleared for ACH payments. These do not require any action on your end.
Any other status (including Declined, Failed, Voided, Cancelled, ChargedBack, Held, or HeldByProcessor) indicates the payment did not succeed.
Other useful fields
| Field | Description |
|---|---|
transactionDetails.transactionReceipt.amount | Charged amount (in USD). |
transactionDetails.transactionReceipt.transactionId | Transaction identifier. |
metadata | Metadata provided at payment session creation. |
customerId | Customer record associated with the payment, if a payment method was saved. |
When a payment session is created with a customerId that has saved payment methods on file, Flute Checkout automatically surfaces those methods on the payment page. The customer can select a saved card or bank account and complete the payment without re-entering their details, providing a faster checkout experience for returning users.
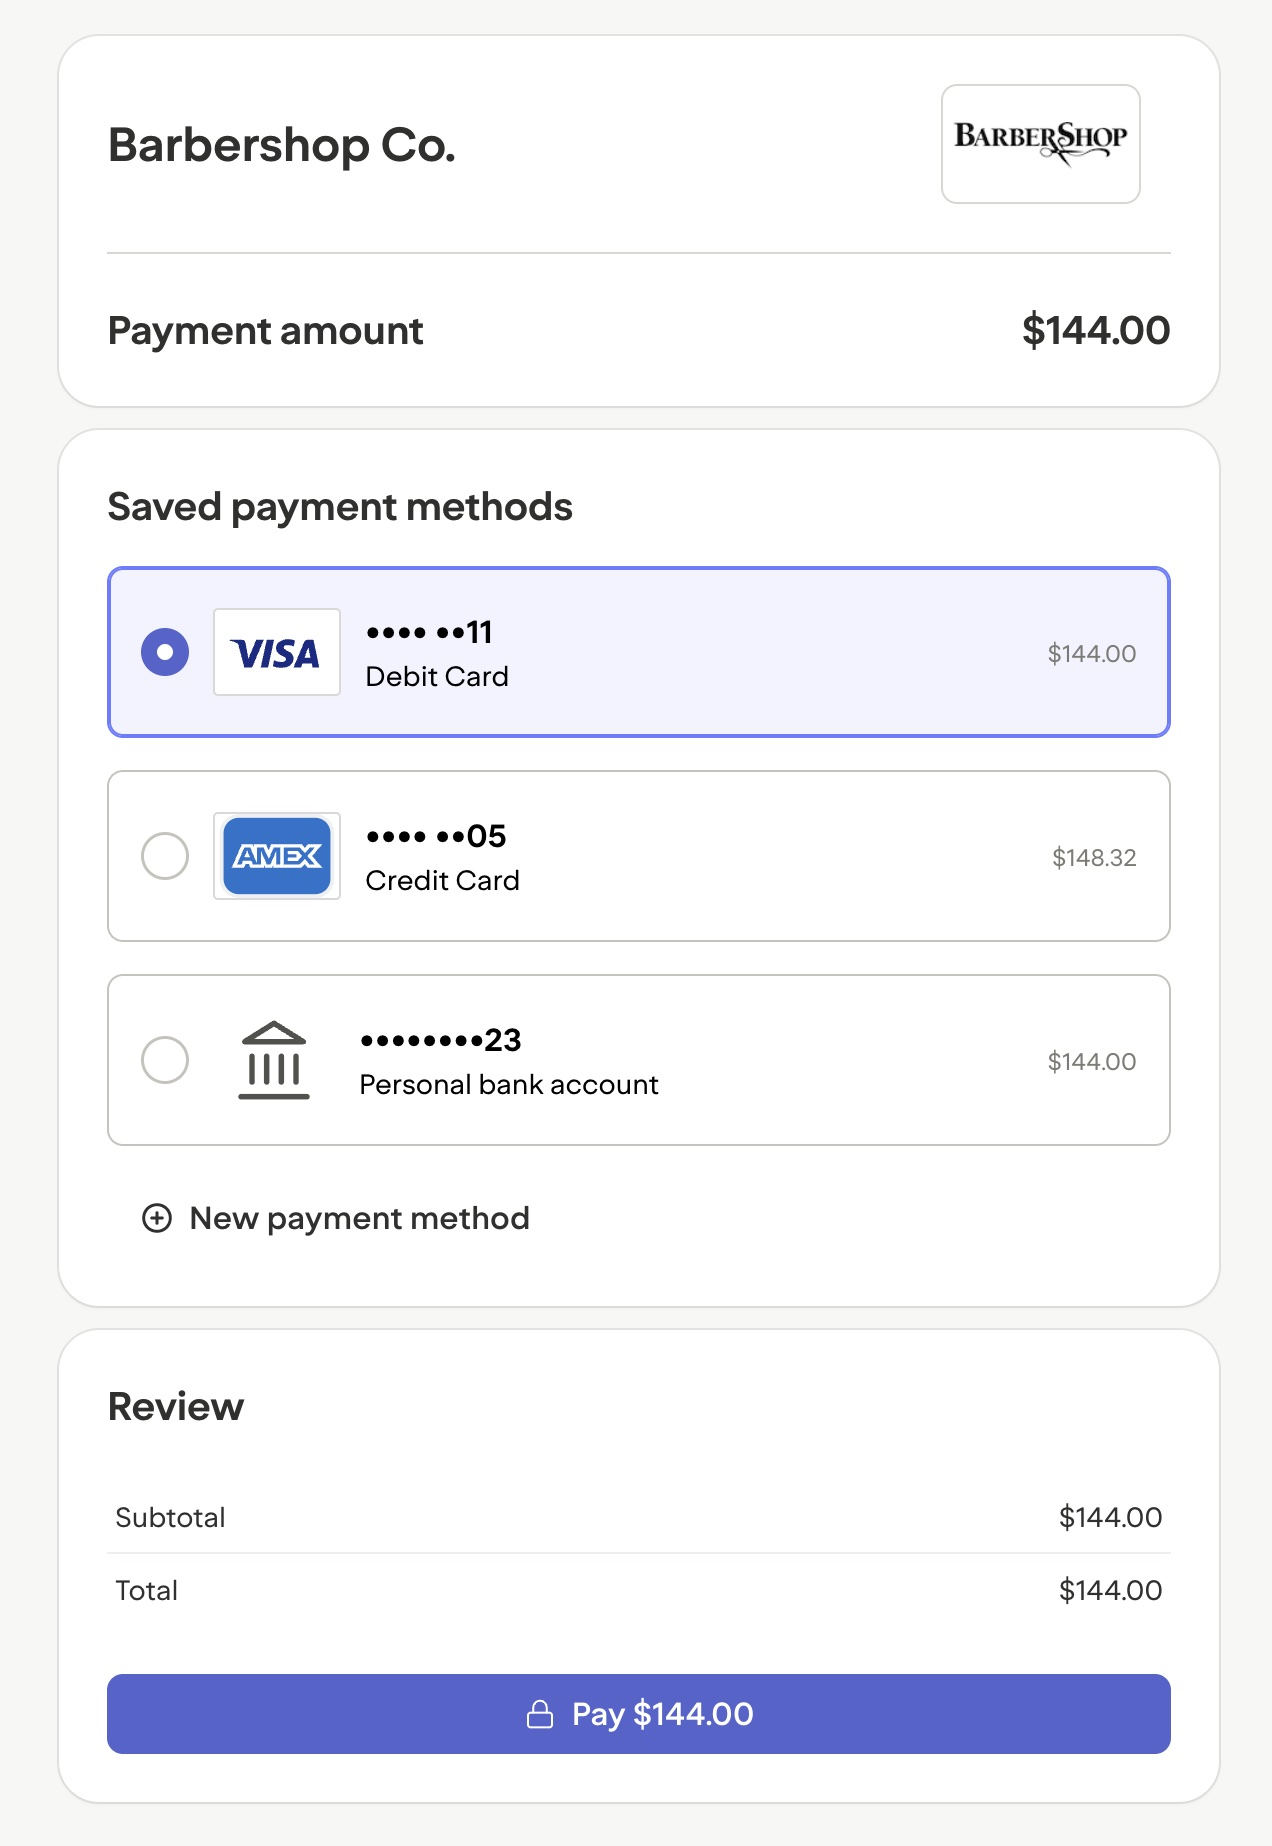
Pass customerId when creating the payment session:
{
  "amount": 144.00,
  "returnUrl": "https://pay.flute.com/payments/returnUrl/{{paymentSessionId}}",
  "customerId": "CUSTOMER_ID"
}
The checkoutUrl grants access to any saved payment methods linked to the payment session's customerId. Keep it private. Treat it like a one-time payment token. Generate it at checkout time, send it directly to the authenticated customer, and never share or publicly expose it. Anyone with access to the URL can use those saved methods to complete the payment.
This section describes possible errors, following the Flute error format.
| HTTP Status | Error Type | Notes |
|---|---|---|
| 400 | validation_error | Invalid input. This means the request was rejected before reaching the processor. No transaction was created and the session status remains Created. |
| 401 | authentication_error | Missing or invalid OAuth token. Check for missing, expired, or invalid credentials. |
| 403 | authorization_error | The request is forbidden. The caller is authenticated but not authorized to perform the action. Check API key permission levels. |
| 404 | not_found | Payment session not found. |
| 409 | conflict | Payment session not in valid state for operation. The request is valid and well formed. Fulfilling the request would conflict with an existing resource state. Common examples include registering the same webhook endpoint twice or attempting to void a transaction that has already settled. |
| 422 | payment_error | Payment declined or processing error. The submission was rejected after reaching the processor. The payment session is now Failed. A new payment session must be created for another payment attempt. |
| 429 | rate_limit_error | Rate limit exceeded on public endpoints. Reduce the request rate or wait before retrying. |
| 500 | internal_error | Server error. |
The following is an example returned error.
{
    "error":
    {
        "type": "validation_error",
        "message": "Invalid payment method type",
        "details": [{ "field": "paymentMethodTypes", "message": "Allowed values: 'card', 'ach'" }]
    }
}The hosted checkout page can be customized so it feels like part of your own website. Configurable components include the merchant logo, font, accent color, and page background color.
To configure these branding options:
- Navigate to the partner's Flute dashboard page.
- Select Merchant from the left menu panel. This displays the list of merchants for the partner.
- Select the individual merchant.
- Select Impersonate merchant. This allows the partner to act on behalf of the merchant.
- Select Settings from the left menu panel.
- Select Profile in the right navigation panel. This displays the branding options page.
- Select options under the Branding and customization section.